Note: Keep in mind that if signature lines are inserted into the footer, the lines will print on every page of the contract.
In this Topic Hide
Use the Footer tab to insert the standard and user tags and static text into the contract footer. This information might include the signature lines or a statement from the organization. The footer will display on all pages of the contract.
Note: Keep in mind that if signature lines are inserted into the footer, the lines will print on every page of the contract. |
Use standard text entry methods to type text into the footer manually or use the Ctrl+C and Ctrl+V shortcuts to copy and paste text from another document.
Use the Rich Text Editor to apply font, paragraph and alignment formats to the tags and text.
 |
Best Practice: Use standard and custom tags to insert information into the template footer that will change each year or is standard for your organization, e.g., signature lines or a statement from the organization. Type text manually only if that text will not change from one year to the next. Following this practice will save time when updating your contract templates for a new school year. Tags are inserted automatically after the last character typed on a page. This character might be in the template body, header, or footer. Best practice is to insert the tags as the contract footer is typed. |
![]()
Follow these steps to create the footer template.
On the Add/Edit Template page, click the Footer tab.
Use a combination of these methods to create the template footer.
Method |
Description |
More Information |
Tag |
The Tag Drop-down List displays the standard tags provided with LINQ EP. Best Practice: Tags are inserted automatically after the last character typed on a page. This character might be in the template body, header, or footer. Best practice is to insert the tags as the contract footer is typed.
When inserting a tag into the footer after the contract footer is typed:
|
|
User Tag |
The User Tag Drop-down List displays the custom tags created by your organization. Best Practice: User tags are inserted automatically after the last character typed on a page. This character might be in the template body, header, or footer. Best practice is to insert the user tags as the contract footer is typed.
When inserting a user tag into the footer after the contract footer is typed:
|
|
Manual |
Type text manually or use the Ctrl+C and Ctrl+V shortcuts to copy and paste text from another document. Use the Rich Text Editor Tools to format the text. Best Practice: Proofread typed text carefully for grammar and misspelled words. A spell check tool is not available. |
When finished, click
the ![]() button.
button.
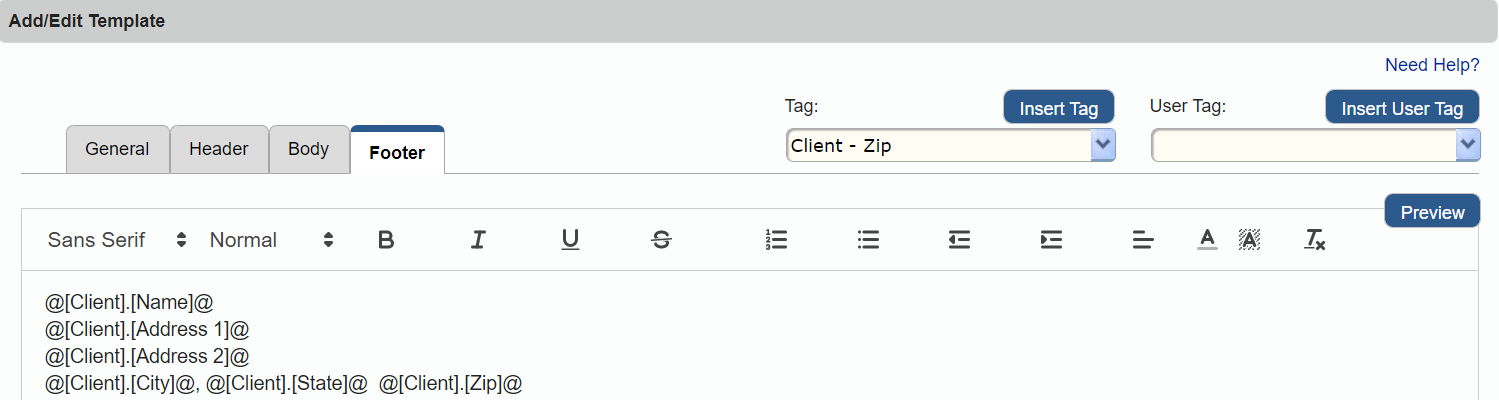
This illustration shows an example of a contract template footer. In this example, standard tags that represent organization's name and address are inserted in the upper left corner of the text box.
Follow these steps to modify the contract template footer. You can add, change, or remove a tag, update text, and apply different formats.
To modify the template footer:
Go to the Contracts page > Templates tab.
In the Templates
grid, click the Edit icon
![]() that corresponds to the
contract template to be modified. The Add/Edit
Template page appears with the General
tab selected.
that corresponds to the
contract template to be modified. The Add/Edit
Template page appears with the General
tab selected.
Click the Footer tab.
Make the necessary modifications to the template footer.
When finished, click
the ![]() button.
button.
Use the Preview page to verify the headers, footers, and page margins are correct and to proofread the contract details for grammar, punctuation, and spelling errors. The contract template displays in a PDF viewer.
To preview a contract template:
Go to the Contracts page > Templates tab.
In the Templates
grid, click the Edit icon
![]() that corresponds to the
contract template to be previewed. The Add/Edit
Template page appears with the General
tab selected.
that corresponds to the
contract template to be previewed. The Add/Edit
Template page appears with the General
tab selected.
Click the ![]() button. The contract template displays in a PDF viewer as it will
appear after it is processed.
button. The contract template displays in a PDF viewer as it will
appear after it is processed.
Click and drag the Vertical Scroll Bar to the bottom of the PDF viewer to view the footer.
Close the PDF viewer when finished with your review.
![]()